Connect ChatGPT
Turn on developer mode in ChatGPT and add Layven as a plugin. There is no token to paste, you approve access in the browser.
Last updated 4 August 2026
This takes about three minutes. There is nothing to copy or paste: ChatGPT sends you to a Layven page where you pick which agent token it should use, and every write it makes is attributed to that token and revocable at any time.
Turn on developer mode
Go to Settings, then Security and login, and scroll to the Developer mode section. Turn Developer mode on. This is what lets you add a plugin by URL instead of picking one from the store.
Leave Enforce CSP in developer mode off, which is the default. It applies the stricter production content policy to plugins that render their own interface inside ChatGPT. Layven renders none, so this toggle should not affect it either way.
chatgpt.com → Settings → Security and login 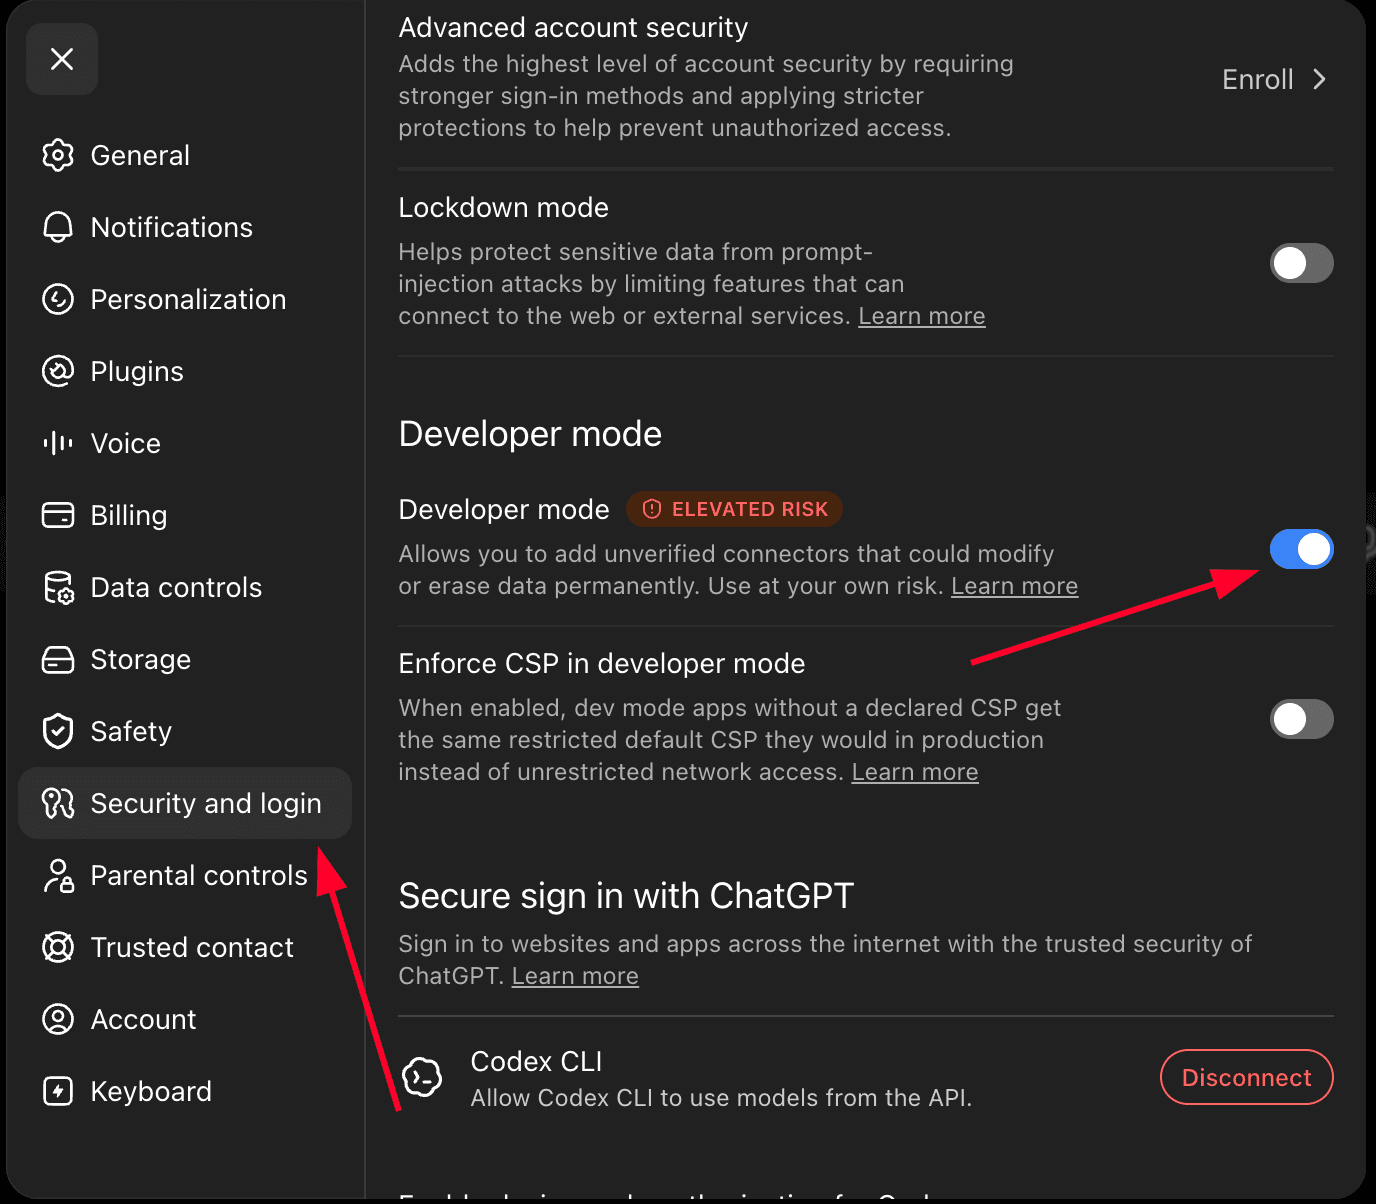
Open Plugins in settings
Still in Settings, go to Plugins, then choose Browse plugins.
chatgpt.com → Settings → Plugins 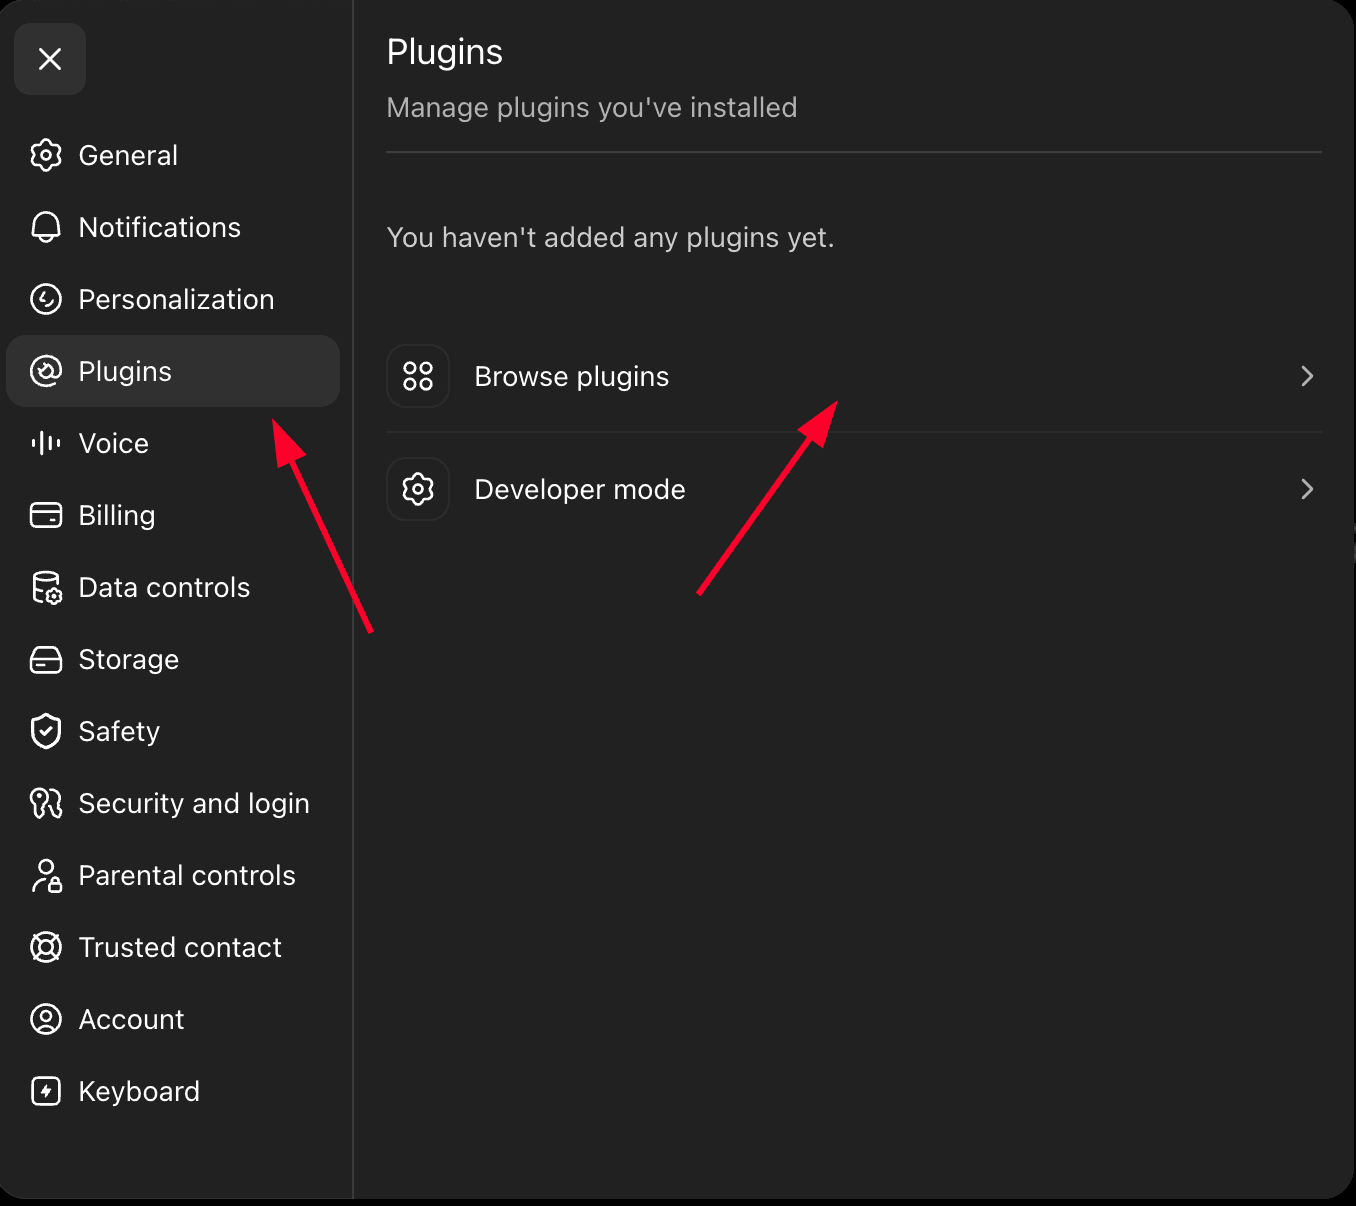
Start a new plugin
On the Plugins page, click the + button in the top right, next to the search field.
chatgpt.com → Plugins 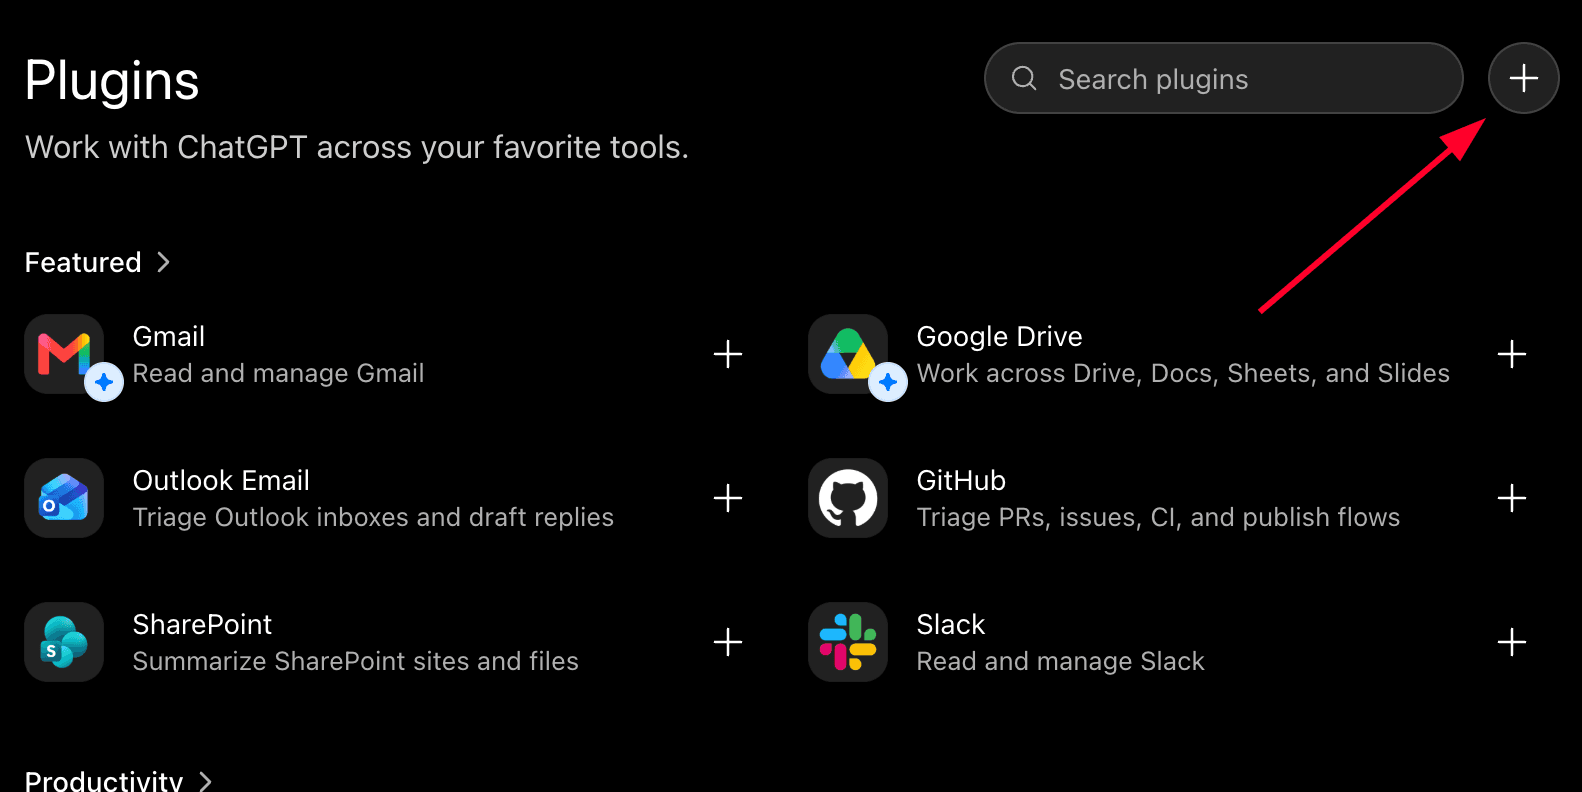
Point it at Layven and create it
Name it Layven. The icon and description are optional, so skip them. Leave Connection set to Server URL, not Tunnel, and paste this in:
New Plugin → Server URLhttps://api.layven.io/mcp
Set Authentication to OAuth and leave Advanced OAuth settings alone; ChatGPT discovers those from Layven. Tick I understand and want to continue to clear the custom MCP server warning, then click Create.
chatgpt.com → New Plugin 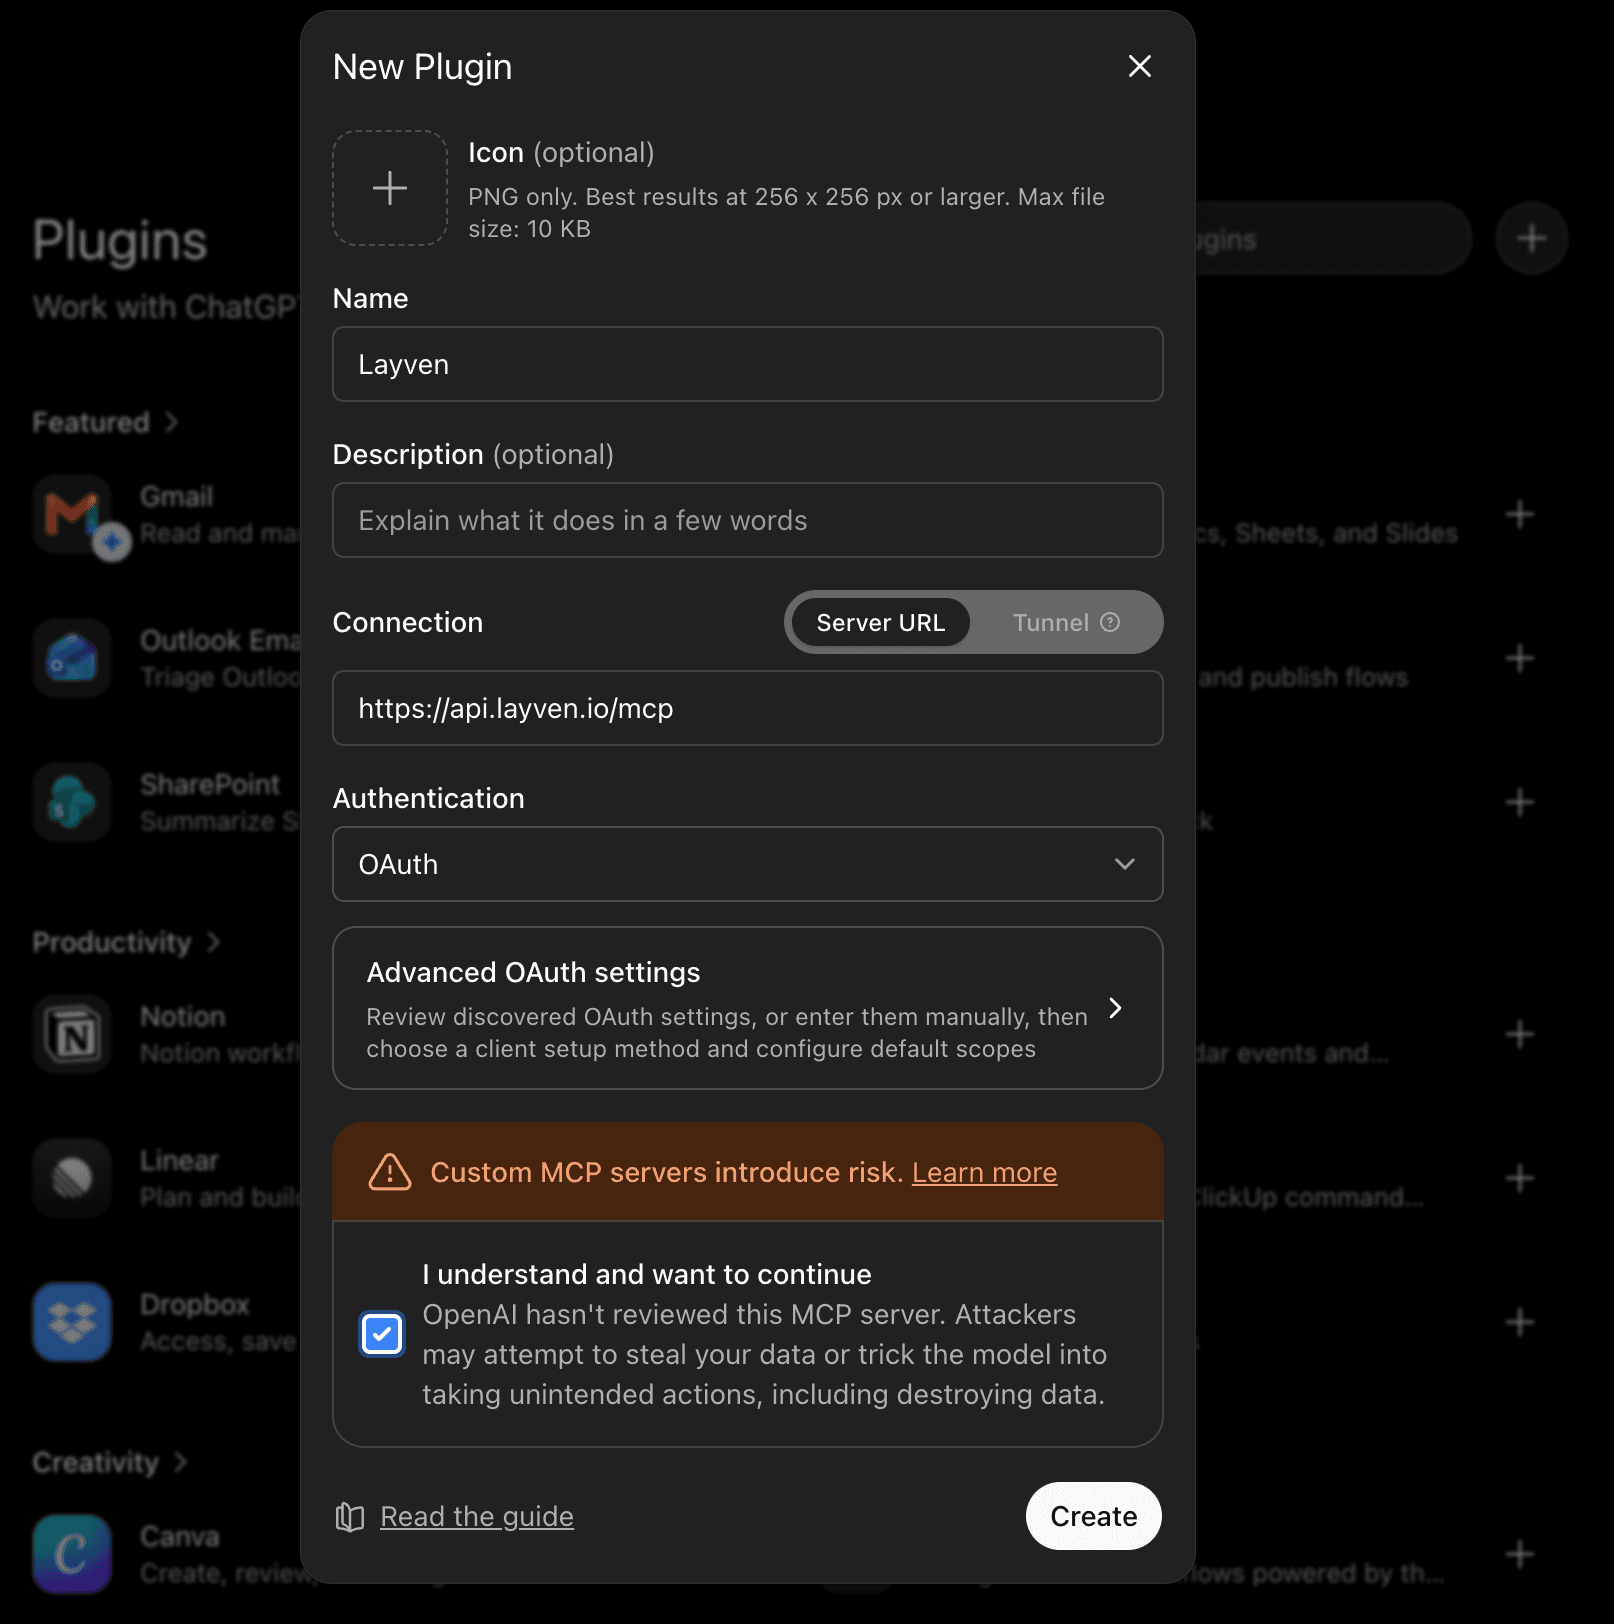
Pick the agent token ChatGPT should use
ChatGPT opens a Layven page listing your agent tokens, each showing the workspaces it was granted and at what access level. Pick one and click Approve. ChatGPT gets exactly that token’s access and nothing more: a workspace the token was never granted stays invisible to it, however you phrase a prompt later.
The grants are shown here but not editable: which workspaces a token can reach was decided when you created it. To give ChatGPT different access, create a token with the grants you want and approve that one instead. Every write ChatGPT makes from then on is signed with the token you picked.
Check your network
Nothing on your own machine has to change. ChatGPT talks to Layven from OpenAI’s servers, and file transfers go the same way, so a VPN, proxy or firewall on your side does not come into it.
Write a test file to confirm it worked
Start a new chat, turn the plugin on for that chat, and ask ChatGPT to create a file:
Write a file called hello.md in my Layven workspace that says hello from ChatGPT.
Open the Layven console and look for hello.md at version 1, attributed to this connection. If it is there, the connection works, and any other client you connect reads that same file without you copying anything anywhere. That is the setup done; the step below is optional.
Optional: make Layven the default place files go
Connected, ChatGPT treats Layven as one tool among many and reaches for it when a prompt clearly calls for it. A standing instruction makes it the default instead, so “save that” means saving to your drive rather than to a message you have to scroll back for.
Open Customize ChatGPT from the profile menu, or Settings then Personalization, and paste this into either custom instructions box. Replace the workspace name with your own, and drop that sentence entirely if the token you approved reaches only one workspace.
Customize ChatGPT → Custom instructionsUse Layven as my file storage. When I ask you to read, write, edit, search or list files, or to keep something for later, use the Layven tools rather than the local file system. Default to the your-workspace workspace unless I name another, and tell me the path and version you wrote.
This applies to every chat. If you only want it in one place, put the same text in a single project’s instructions instead, where it applies to chats in that project and nowhere else.
Revoke access
Deleting the plugin in ChatGPT stops it reaching Layven, but the token it was using stays live for anything else attached to it. To kill the credential everywhere, open Agents in the console and revoke the token: it stops working on the next request for every client using it, and everything ChatGPT wrote stays exactly where it is with its history intact.
Next
Connect a second client and point it at the same workspace. Two agents sharing one drive is the part that does not exist anywhere else: Claude, Claude Code, or Cursor.